The Background Image Settings sheet provides several ways for you to customize how your background image is drawn on the page. You can create a pre-rendered full-page-sized background image, or you can also use small images and tile them on the page for N-Up layouts. For example, you can create a small image of a single raffle ticket, and have Easy Numbering automatically tile it across the page for you in an N-Up layout.
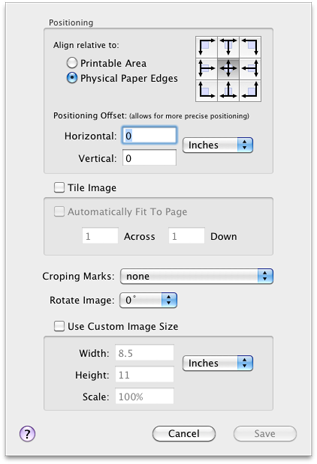
You can align the edges of your image relative to the Printable Area or
Physical Paper Edges. The printable area is the area on the page that your printer
is capable of printing to. In the Page Layout pane, it is the white area of the page. If you choose
to use a full-page-sized background image, you should align to the physical paper edges.
The 3x3 grid of buttons let you specify if you want the image centered horizontally
left/centered/right-aligned and vertically top/middle/bottom aligned
Once the image is aligned, if you are not happy where background image appears on the page, you
can shift it horizontally and vertically to your desired position on the page with the Positioning Offset.
You can also set the positioning offset visually in the main
document window by “nudging” the background image with your arrow keys. To do this,
make sure you have no positions selected (otherwise you will nudge the selected positions) and
the Page Preview pane has the keyboard focus.
If you are using a small background image that you want repeatedly drawn across the page, check the Tile Image checkbox. You can allow Easy Numbering to fill the page with as many copies of your background image as will fit, or you can uncheck the Automatically Fit To Page checkbox and specify how many copies you want repeated across and down the page.
When you are printing multiple forms/tickets per page, Easy Numbering can also print cropping marks
to help you position your blade when you are cutting the paper. To use this feature, your
background image must be of an individual form/ticket so you can have Easy Numbering tile the
image for you. That is, you can't use a full-page-sized background image since there's no way
to tell where the edges of the tickets are.
Your options for adding Cropping Marks are:
If your background image isn't in the orientation that you need, you can rotate it by 90° increments (0°, 90°, 180°, 270°).
If your background image isn't the size that you need it to be, you can modify the image size. To specify a custom image size, check the Use Custom Image Size checkbox and specify the new size that your image should be drawn at.